Sunday, 21 July 2013

Kids Clothes Week Project 3 - Trackie dacks


For my son K, to show him that I love him enough to (occasionally) sew something for him too. No pattern - just drafted from another pair of pants, with pockets added in the front. I used a pocket pattern piece and instructions from some shorts in Happy Homemade vol. 2, because pockets do my head in so I didn't think I could draft them myself.


Fabric is cotton jersey from Spotlight and a bit of ribbing from the op shop, with some fluoro green synthetic stuff for piping and the tie at the front. Used some cool fluoro thread for overstitching, and put an iron-on sports number on the back: 9, for K's age. Naturally, I didn't notice the flaw in the jersey - a kind of raised bit with a tiny hole - until I had finished the pants, and naturally that flaw is positioned right at the front. I ironed a bit of interfacing on the back and am hoping the pants will last at least a few weeks before I have to mend them. And if you're wondering what the hell 'dacks' are, it's Aussie slang for pants (and 'dacking' someone is when you sneak up and pull their pants down, but don't tell my kids that because it'll give them ideas).


K saw the pants as I was putting the finishing touches on and said 'these are awesome!'. So, success.

Friday, 19 July 2013

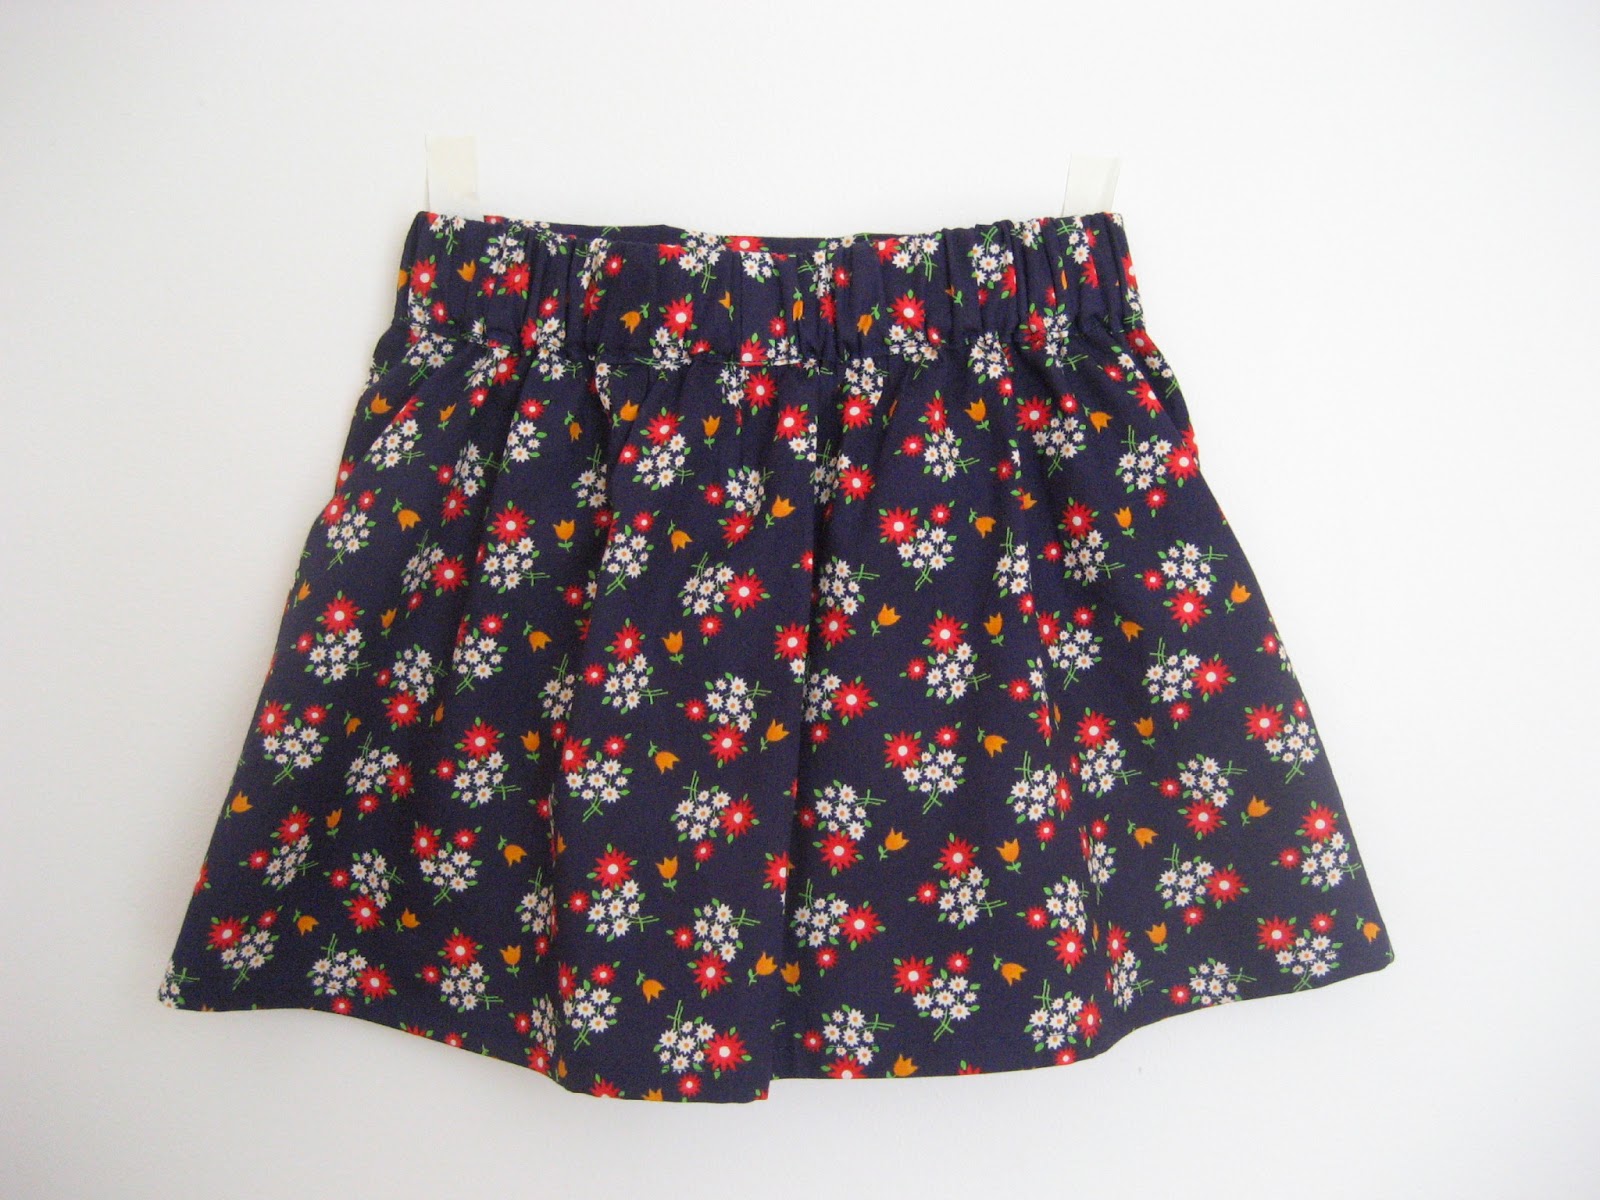
Kids Clothes Week Project 2 - Flowery skirt


This fabric caught my eye about a month ago in Spotlight and I spent weeks wondering what to use it for before deciding on a Burda Magazine skirt pattern (which I notice you can buy as a single pattern here). I made a few changes: I altered the waistband so the skirt would have a waistband at the front and an elasticised casing at the back (instead of the original design which has a zip at the back) and left out the underskirt.


I got a bit of a head-start last week by forcing myself to sew the bits I knew I would least enjoy (the pocket flaps) so I could forge ahead with the rest of the skirt without dreading all the pinning and piping that the pockets entail. As it was I found putting the pockets in very confusing, despite having made a skirt from this pattern before (curse you, Burda magazine, with your confusing instructions!) but somehow bluffed my way through and they worked out fine.


It is, of course, winter here in Australia, but given that we've just had our warmest July day EVER (a balmy 23 degrees, followed by a massive thunderstorm) I think I can be forgiven making something so summery, in anticipation of warmer weather... and in the meantime, it'll have to be worn with tights and a cardigan.

Wednesday, 17 July 2013

Long time no sew... Kids Clothes Week, Project 1

 
...although that's not quite true. I have been sewing, and have even finished a couple of skirts for R and a top for myself, but as we've spent the past month playing tag-team with a particularly debilitating virus, and as during this time I managed to drop my camera, completely destroying it, blogging has fallen by the wayside. But now I'm back! Thanks to my mum's old camera and Kids Clothes Week (not to mention several litres of lemon and honey drink and a couple of boxes of panadol) I have sprung back to life. And made a new dress for R. And photographed it.


Pattern: 'Dress with frilled shoulders' (dress a) from Happy Homemade Vol. 2
Size: 4, and it fits perfectly
Fabric: Denim chambray with ribbon detail

This is a really sweet pattern which is easy to sew. I like the narrow width of the frills, and the square neckline lends itself perfectly to embellishment with ribbon. Having failed to find the 'perfect' ribbon in any of the FOUR fabric shops I went to, I ordered one online from Ribbons Galore (great service - will be using them again).


R loves her new dress almost as much as she loves the little present I gave her as a modelling inducement.

Monday, 10 June 2013

Sew your pants


Back in my primary school days if someone said 'so what?' a common smart-alecky retort would be 'sew your pants.' And that's what I did this weekend: sew your pants. My husband's pants, to be precise. Here's an exchange from a few weeks ago that led to this exciting development:

Husband: What are  you doing?
Me: Blogging R's dress.
Husband: What about those torn pants I gave you to mend a year ago? Are you going to blog them too?
Me: Well, yes, I think I will. 

And here they are. Mended. Blogged. As promised!

Wednesday, 22 May 2013

Winter dress in corduroy


Another pattern from Girls Style Book: an unlined A-line dress with straps. The pattern is intended to be loose-fitting with no opening at the back, but I adapted it by taking in the sides a couple of centimetres, adding an invisible zip and lining the whole dress. The dress in the book is in linen, which would be stunning, but as much as I wanted to, I couldn't justify making a linen dress at such a chilly time of year. So I went for corduroy instead, with cotton lining, and it's nice and cosy.


When we had a bit of sun today I rushed out to get some photos but R was not terribly cooperative - she seems to really dislike being photographed lately. Then she started being silly and the shoot degenerated into a gigglefest... and I ended up without a photo that shows the dress in its entirety. It is seriously cute though!

Sunday, 19 May 2013

A blouse for R

I have no idea why R chose to hold a spade for this photo..

There are a couple of Japanese pattern books I've been coveting for ages, but things are a bit tight financially and I have displayed an amazing amount of restraint (so far) by not buying them. Happily, both the books have recently appeared in our local library and are currently in my possession, where they will remain for at least three weeks - at which point I'll probably have to buy them for myself anyway because they're so fantastic.

I chose a blouse pattern from the fabulous Girls Style Book but had no idea what size to trace for R. She's very petite - so wouldn't a Japanese pattern fit her better than, say, an American one? Turns out that would have been a very bad assumption to make. I did a bit of research and found this great French website where you can click on various Japanese pattern books and see (and read about, if you speak French) what different people have sewn from them. I soon established that the sizes in Girls Style Book are huge, which is good to know as I would have been very annoyed had I sewn up a gigantic, tent-like garment.

In keeping with my no-budget approach to sewing (which will probably not last the week, given that I now have two books full of great patterns), I used some fabric my mum gave me a couple of years ago. And although I wasn't that keen on the fabric at first, I have grown to like it a lot.

So here it is, pattern L made in size 2 with size 4 length for my 5-year-old daughter. Simple to sew and very sweet.


Wednesday, 8 May 2013

Playgroup art and craft: Autumn leaves


We are well into Autumn now, and many trees around Melbourne are turning glorious shades of yellow, orange, red and brown. Among Autumn's great pleasures are admiring the changing colours, finding especially beautiful leaves on the ground and enjoying the wonderful crunch of dry leaves underfoot (when it hasn't been raining. The sludgy, slimy feeling of walking on wet leaves is not so pleasant).

R and I collected some Autumn leaves and a bag of gumnuts to take to playgroup and found that they made interesting patterns when dipped in paint and pressed onto paper. The leaf patterns soon disappeared as the children discovered the joys of fingerpainting and handprints!


Today R and I came across some irresistible leaves at the park and brought them home. I asked her to arrange them on a piece of greaseproof (waxed) paper, put another piece on top and ironed it. She was delighted to see her leaves sealed inside the paper! I have fond memories of making these leaf pictures in kindergarten (or perhaps school?) as a young child. When put up on a window they  have a lovely translucence.

 
Two things to remember: make sure the waxed sides of the greaseproof paper are facing each other so the wax can melt and seal the picture, and put a tea-towel or cloth over the paper before you iron it, or you may end up with a waxy iron.